Introduction
The best way to get the look of the zone you are mapping into your final image is to take screenshots of the textures in use in that zone. Actually creating the map takes you out of the zone you are mapping, unless you have EQ2 running in the background, or have perfect memory. A great way to remember what the zone looks like is to take effective screenshots after or during your /loc collection. You can also capture geometry which you will recreate in Line Cleanup. Additionally, if you are not doing the final map image, you can use screenshots to communicate the look and feel of the map to your mapper.
EQ2 Settings
There are several EQ2 settings and commands that can help you to gather screenshots more effectively.
- Graphical Settings
Before you collect textures for you map, take a moment to up your graphics setting to the highest quality for textures and geometry. While one FPS would never allow you to play, it allows you to get awesome screenshots. You may also try disabling anisotropic filtering, relief, and shadows to get crisper textures.
- Disable Letter boxing
There is no need to have letter boxing enabled when you take screenshots. You want as many useable pixels as you can get, and sometimes the best ones can be found "behind" your character in area usually hidden by the letterbox.
- F10 - Toggle UI
By default the F10 key cycles through the UI states, including disabled. You can quickly disable the UI while you take some screenshots, then turn it back on to continue moving.
- F9 - Toggle First Person
While only occasionally useful for gathering screenshots and textures, F9 will toggle you in and out of first person view quickly.
- PrtScr - Take Screenshot
The default key to take a screenshot is the PrtScr key on your keyboard. Screenshots are automatically placed in the Screenshots subdirectory of your EQ2 install. Note that the number of the screenshot is always the next number after the highest numbered screenshot currently in the screenshot directory. If you move files out you will get repeated numbers.
- Increase Max Camera Distance
Setting, Controls -> View Options -> Max Camera Distance, move the slider all the way to the right. Allows you to zoom your camera WAY out, assuming there are no ceilings in the way.
Character Settings
- Invisibility
Invisibility can be very useful for removing yourself from the picture. In many cases you can take a picture of a texture through your body and, when it is resized, your character will no longer even be visible. At very least you are significantly easier to edit out of the image, especially when combined with:
- Small Character Profile
Smaller is better. Time to break out that Rotonga, Halfling, or Dwarf. Sure, you may be short stuff, but at least you're not in the way of your own camera.
- Disguises
There are a number of questable or holiday reward items which change your size or shape. One in particular, the Cloak of the Harvester, turns you into a rolling stone, which has a very low profile (and gathers no moss).
- Glowing Items
Some spells, weapons, or items have a glow associated with them. Bring several glowing items, because they emit different colored light. The wrong color you can wash out or alter the texture you are trying to capture, so having several to choose from is handy. In a dark zone, the benefits of having a light source that moves with you cannot be overstated.
Gathering Map Textures
There are several factors you must pay attention to when gathering map textures. Lighting, zoom level, camera angle, and alignment are all keys to capturing a usable texture.
Camera Angle and Zoom
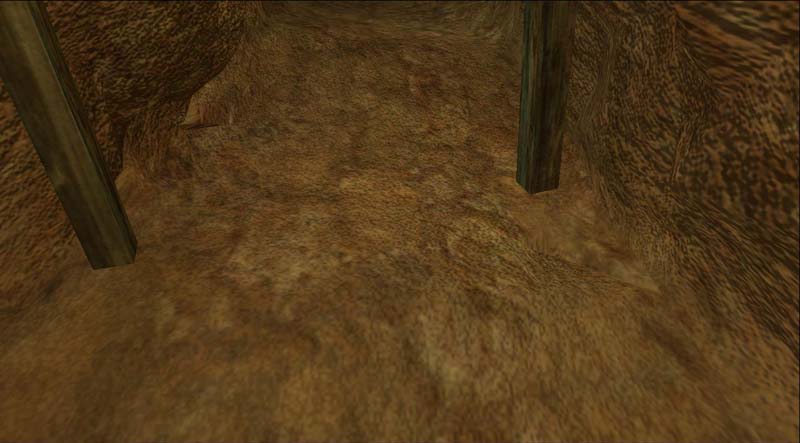
Up and out is usually the way to go. Zoom out as far as the zone will allow and point as close to straight at the ground as you can. You want to minimize the perspective distortion of the in-game camera. If you don't have enough headroom to zoom all the way out, it may make sense to zoom all the way in to first person, such as in Figure 3.1, from underneath Deathfist Citadel.
Lighting
Good light, especially in dungeons, is hard to come by. Make sure that when you capture your image you have as much light as possible and that the light is as uniform as possible. Depending on how large the texture is you may only want a single tile, or you may want a number of tiles over a large area. You will find that if the lighting is not uniform across the texture it becomes very hard to re-tile it, since you'll have light or dark stripes across your repeating texture.
Alignment
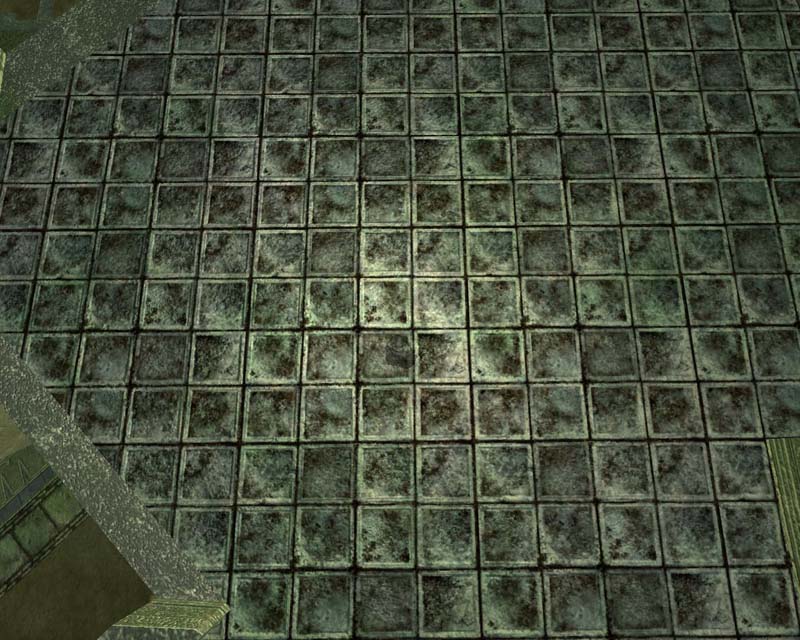
If you are capturing a repeating texture, try to align the camera as square with the texture as possible. Figure 3.2 above shows a very good texture alignment. All that is left to do is to correct for the perspective and shrink and it can be placed right on your final map. Section 5, Map Creation, covers texturing in detail.
Understanding the Zone
Some zones are more complex than others, with multiple heights, textures, and bridges. A good set of establishing screenshots will serve you well as you or your mapper sit down to create your final map. You may wish to keep your screenshots file window open as you capture shots and change their name as you take them.
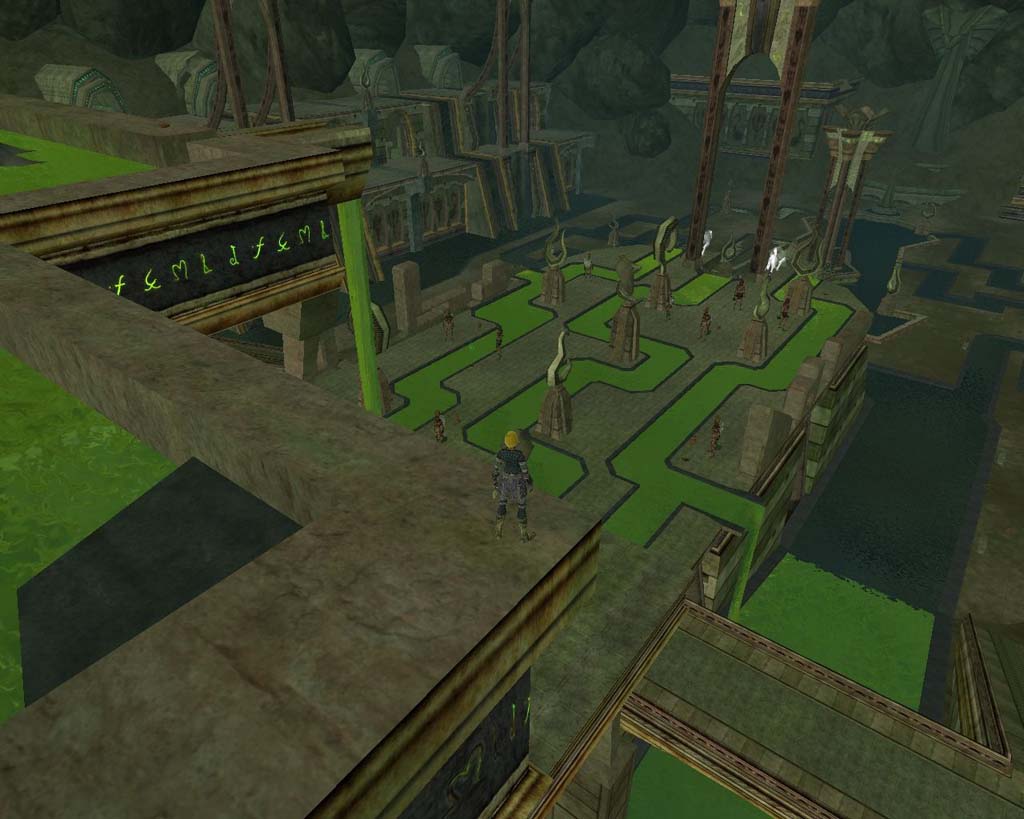
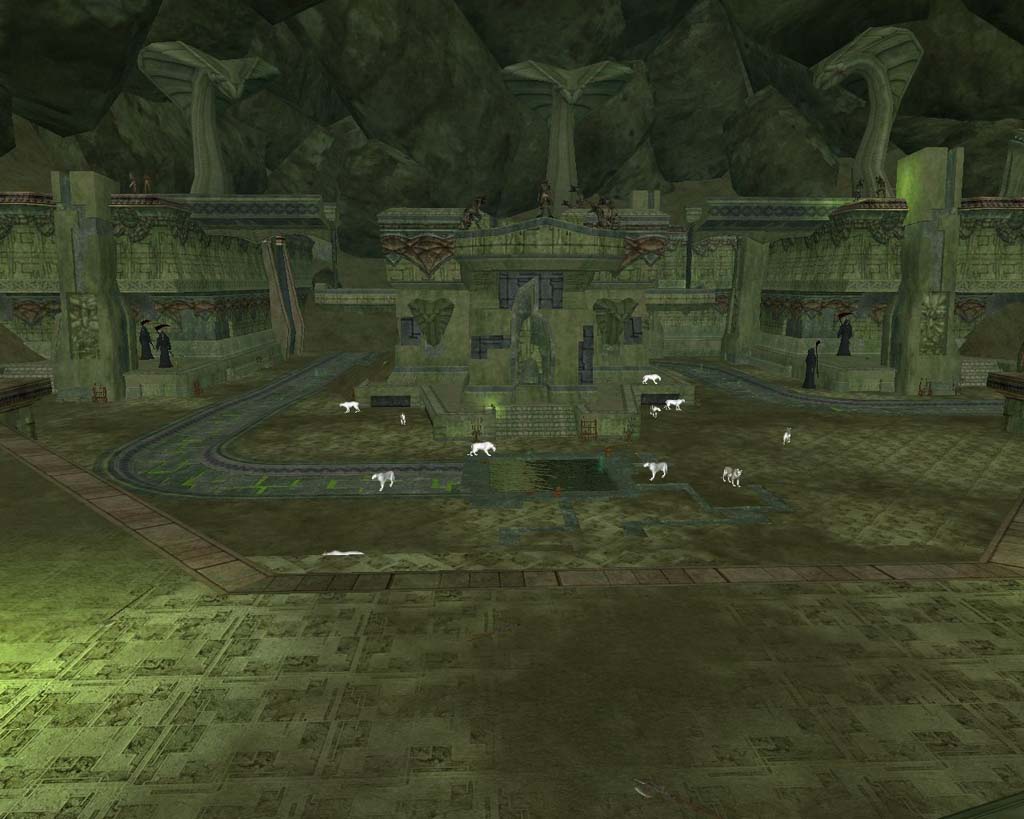
When I was mapping The Silent City, I ended up with a whole folder of screenshots with names like "sc_epic_screenshot_top_lvl_looking_sse" (Figure 3.3) and "sc_enterance_lower_area_looking_south" (Figure 3.4). These helped immensely with getting down all of the different texture locations; each raised area had a different texture.
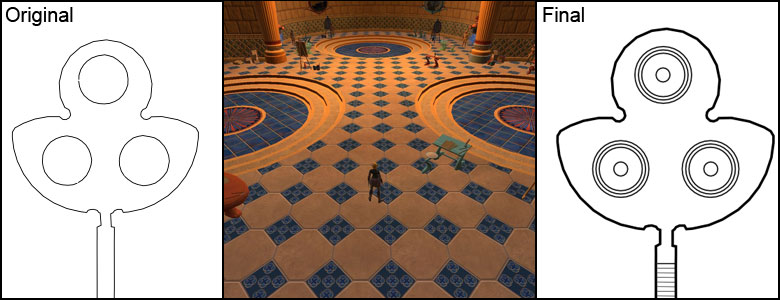
Replicating Complex Geometry
Using screenshots can enable you to replicate geometry without having to capture it all in-game. All you need to do is capture the outside of a stepped geometric shape and you can recreate the inside with reference to a screenshot of the area.
For example, in Poets palace there were a large number of stepped shapes. I was able to capture just the outlines and then fill in the details later. Figure 3.5 shows my original /loc capture, the screenshot, and the final SVG output.